The Redmi A3 is loved for its advanced features and user-friendly interface. One of its convenient features is the various ways it provides for taking screenshots.
Taking screenshots is an important feature of smartphones. With the Redmi A3, you can effortlessly capture and share what’s on your screen. In this guide, we’ll show you how to take a screenshot using different methods.
Contents
- 1 Various Methods to Capture Screenshots on Redmi A3
- 1.1 Method 1: Take a Screenshot using the Physical Button Keys
- 1.2 Method 2: Use Gestures to take a Screenshot
- 1.3
- 1.4 Method 3: Capture Using Accessibility Menu
- 1.5 Method 4: Take a Screenshot via the Notification Bar
- 1.6 Method 5: How to Take Scrolling Screenshot or Long Screenshot
- 1.7 Method 6: Take a Screenshot Using Google Assistant
- 1.8 Method 7: Take a Screenshot Using Quick Ball
- 2 The Benefits of Taking a Screenshot
- 3 How to Edit the Screenshot
- 4 How to Access Captured Screenshots?
- 5 About Redmi A3:
- 6 Conclusion
- 7 Also Read
Various Methods to Capture Screenshots on Redmi A3

To capture a screenshot on your Redmi A3, Xiaomi offers a variety of convenient methods that are designed to make the process effortless and user-friendly.
Method 1: Take a Screenshot using the Physical Button Keys
To take a screenshot using physical button keys, utilize the built-in feature by simultaneously pressing the volume down and power buttons.
- Press the Power button.
- Simultaneously press the Volume Down button.
- The screen will flash, indicating that the screenshot has been captured.
Method 2: Use Gestures to take a Screenshot
To take a screenshot via 3 fingers gesture on the Redmi A3, first, check the 3-fingers gesture feature is enabled on your device. If it is not enabled, enable it first by using the following steps:

- Go to the Settings menu.
- After that, scroll down and tap on “Additional Setting”.
- Now tap on the “Gesture Shortcuts” option.
- Finally, tap on the “Take a Screenshot”.
- Toggle the ON “Slide 3 fingers down” option.
After enabling the option follow the steps below to take the screenshot.
- Navigate to the screen you want to capture.
- Place three fingers on the screen simultaneously.
- Swipe downwards or upwards to trigger the screenshot gesture.
- Your device will capture a screenshot of the current screen.
You can find the screenshot in your device’s gallery or notification panel.
Method 3: Capture Using Accessibility Menu
To capture a screenshot on your Redmi A3 using the “Accessibility Menu” you first need to enable it. If it is not already enabled, follow these steps to do so:

- Go to Settings.
- Navigate to Additional Settings.
- Tap on the Accessibility option.
- On your screen, again tap on the Accessibility menu.
- Toggle the ON “Accessibility menu shortcut” option.
Press on the Allow Button.
To change the location of the “Accessibility menu”, navigate to Settings > Additional Settings > Accessibility > Accessibility button > Location.
Choose either Floating over other apps or the Navigation bar as your preferred location. If you opt for “Navigation Bar”, a new icon will appear on the right side of your navigation bar.
![]()
To capture a screenshot, simply tap on the Accessibility Icon and select the Screenshot option.
Method 4: Take a Screenshot via the Notification Bar
Screenshot using the notification panel is one of the simple processes to capture a screenshot. Follow the steps below to perform the above operation:

- Choose the screen you want to capture.
- Swipe down from the top of the screen to reveal the notification bar, then locate the “Toggles” section..
- Identify the screenshot icon, which often resembles a pair of scissors or an image.
- Tap the screenshot icon to capture the current screen.
Method 5: How to Take Scrolling Screenshot or Long Screenshot
A scrolling screenshot is a screenshot that captures an entire page, even if it is longer than the screen. This is useful for capturing long web pages, documents, or chat conversations.
After taking a screenshot by any of the available methods, follow the steps to capture a long screenshot.
- A notification will appear with the screenshot preview and an option to “Scroll“.
- Tap on “Scroll.”
- The screen will start scrolling automatically, capturing the entire page. You can stop the scrolling at any point by tapping on the screen.
- Once you’re satisfied with the captured content, tap on the “Done” button to save the scrolling screenshot.
Method 6: Take a Screenshot Using Google Assistant
Google Assistant can be used to take a screenshot on Redmi A3. Capture a screenshot using Google Assistant by following these steps:
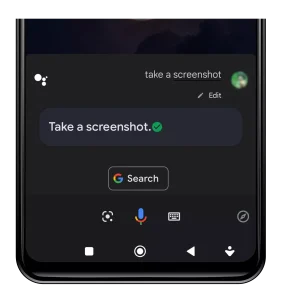
- Launch any app on your Redmi A3 phone that displays the interface you want to capture.
- Activate Google Assistant by pressing and holding the middle navigation button.
- Then, say “Hey Google, take a screenshot” to capture the current screen.
The screenshot will be saved to your phone’s Gallery.
If you are using it for the first time, you’ll need to activate this feature. Here are the steps:
- Open the Google App on your Redmi A3.
- In the top-right corner, tap on your profile picture to access your account settings.
- Select “Settings” from the menu.
- Scroll down and find the “Google Assistant” option.
- Tap on “Google Assistant” and then scroll down to select the “General” option.
- In the General settings, locate and enable the “Use Screen Context” option.
- Also, enable the “Donate Screen Capture” option.
Method 7: Take a Screenshot Using Quick Ball
To enable the Quick Ball option in your settings and take a screenshot using it, follow these steps:

- Go to the settings menu on your device.
- Look for the “Additional settings” section.
- Find the “Quick Ball” option.
- Then switch on the “Turn on Quick Ball” option.
- Once enabled, go to the screen you want to capture.
- Press the Quick Ball and select the Screenshot icon to capture the screen.
- The screenshot will be saved to your device’s gallery or designated screenshot folder.

Enjoy using the Quick Ball to conveniently take screenshots!
The Benefits of Taking a Screenshot
Screenshots serve multiple purposes and are an essential tool in our digital lives. They allow us to capture and later reference information, be it a conversation, a fascinating article, or a specific section of a video.
It can also serve as proof or evidence of digital interaction, making them an essential tool for online transactions or reporting technical issues.
Moreover, screenshots are also useful for sharing content. Whether you’re sending a friend the latest meme, capturing a moment from a video call, or sharing a piece of news, a it gives you the power to share what’s on your screen in an instant.
How to Edit the Screenshot
After taking a screenshot, you might want to add some annotations or blur certain parts. Here’s how you can edit your screenshot on Redmi A3:
- Open the screenshot you want to edit.
- Click on the “Edit” option.
- You’ll see various options like cropping, doodling, adding text, and more. Use these tools as needed.
- Once you’re done, click on “Save”.
How to Access Captured Screenshots?
Here are two methods to view screenshots on a Redmi A3 using the Gallery or File Manager:
Method 1: Using the Gallery
- Open the Default Gallery app on your Redmi A3.
- Tap on the “Albums” tab.
- Select the “Screenshots and screen recordings” album.
All the screenshots you have taken will be displayed here.
Method 2: Using the File Manager
- Open the File Manager app on your Redmi A3.
- Navigate to the “Internal Storage” folder.
- Open the “DCIM” folder.
- Within the “DCIM” folder, you will find a subfolder named “Screenshots”.
- All the screenshots you have taken will be saved in this folder.
You can use either of these methods to view and manage your screenshots on a Redmi A3.
About Redmi A3:
The Redmi A3, released on February 23, 2024, offers a versatile network capability supporting GSM, HSPA, and LTE technologies. It boasts a robust build with dimensions of 168.3 x 76.3 x 8.3 mm and weighs either 193 g or 199 g, featuring a glass front (Gorilla Glass 3), glass back, or silicone polymer back (eco leather), along with a plastic frame. Equipped with a dual SIM (Nano-SIM, dual stand-by) configuration, the Redmi A3 ensures connectivity on the go.
Its captivating display features an IPS LCD with a 90Hz refresh rate, providing vibrant visuals on its expansive 6.71-inch screen. The display is protected by Corning Gorilla Glass 3, ensuring durability against scratches and impacts. Powered by Android 14 (Go edition) with MIUI, the Redmi A3 runs smoothly on a Mediatek Helio G36 chipset and an octa-core CPU (4×2.2 GHz Cortex-A53 & 4×1.6 GHz Cortex-A53), supported by a PowerVR GE8320 GPU.
With memory options of 64GB 3GB RAM, 128GB 4GB RAM, or 128GB 6GB RAM, expandable via a dedicated microSDXC slot, users have ample storage for their files and apps. Its main camera setup includes an 8 MP wide lens with an auxiliary 0.08 MP lens, featuring dual-LED flash and HDR capabilities, capable of recording 1080p videos at 30fps. The selfie camera sports a 5 MP lens, also capable of recording 1080p videos at 30fps.
Redmi A3 ensures seamless connectivity with Wi-Fi 802.11 a/b/g/n/ac, Bluetooth 5.3, GPS, GLONASS, GALILEO, BDS for positioning, FM radio, and USB Type-C 2.0. Additionally, it features a side-mounted fingerprint sensor and accelerometer for added security and functionality. The device is powered by a non-removable 5000 mAh battery with 10W wired charging support, ensuring extended usage without frequent recharging. Available in Midnight Black, Olive Green, and Lake Blue colors, the Redmi A3 offers a stylish and reliable smartphone experience.
Conclusion
Taking screenshots on the Redmi A3 is a breeze, thanks to the multiple methods available. Whether you prefer using physical button combinations, gestures, or voice commands, there is a method that will meet your needs.
The ability to quickly capture, edit, and share information directly from your screen enhances productivity and communication. Master these steps, and you’ll turn your Redmi A3 into an even more powerful tool for your digital tasks.
